Wine Bottles That Have a Light Blue Wrap
This post may contain affiliate links which won't change your price but will share some commission.

How to make elderberry wine – it's something I've wondered about since watching Monty Python's Quest for the Holy Grail many years ago. ("Your mother was a hamster, and your father smelt of elderberries.") It turns out that making homemade elderberry wine is pretty easy, as long as you have elderberries.
If you don't have wild elderberries nearby, you can buy plants and grow your own. (Seeds are not very reliable. I wouldn't waste my time or money on them.) I also make up elderberry jellies and syrups, too, but this post is all about the finding the berries and making wine.
Note: If you don't have access to elderberries, but still want to make elderberry wine, Amazon stocks Elderberries Vintner's Harvest 96oz Canned Elderberry Fruit Wine Base. This base is pure elderberry fruit juice concentrate. It makes 5 gallons of light wine or 3 gallons of full-flavored wine. Recipes are included.
Contents
- How to Make Elderberry Wine – 2 Recipes
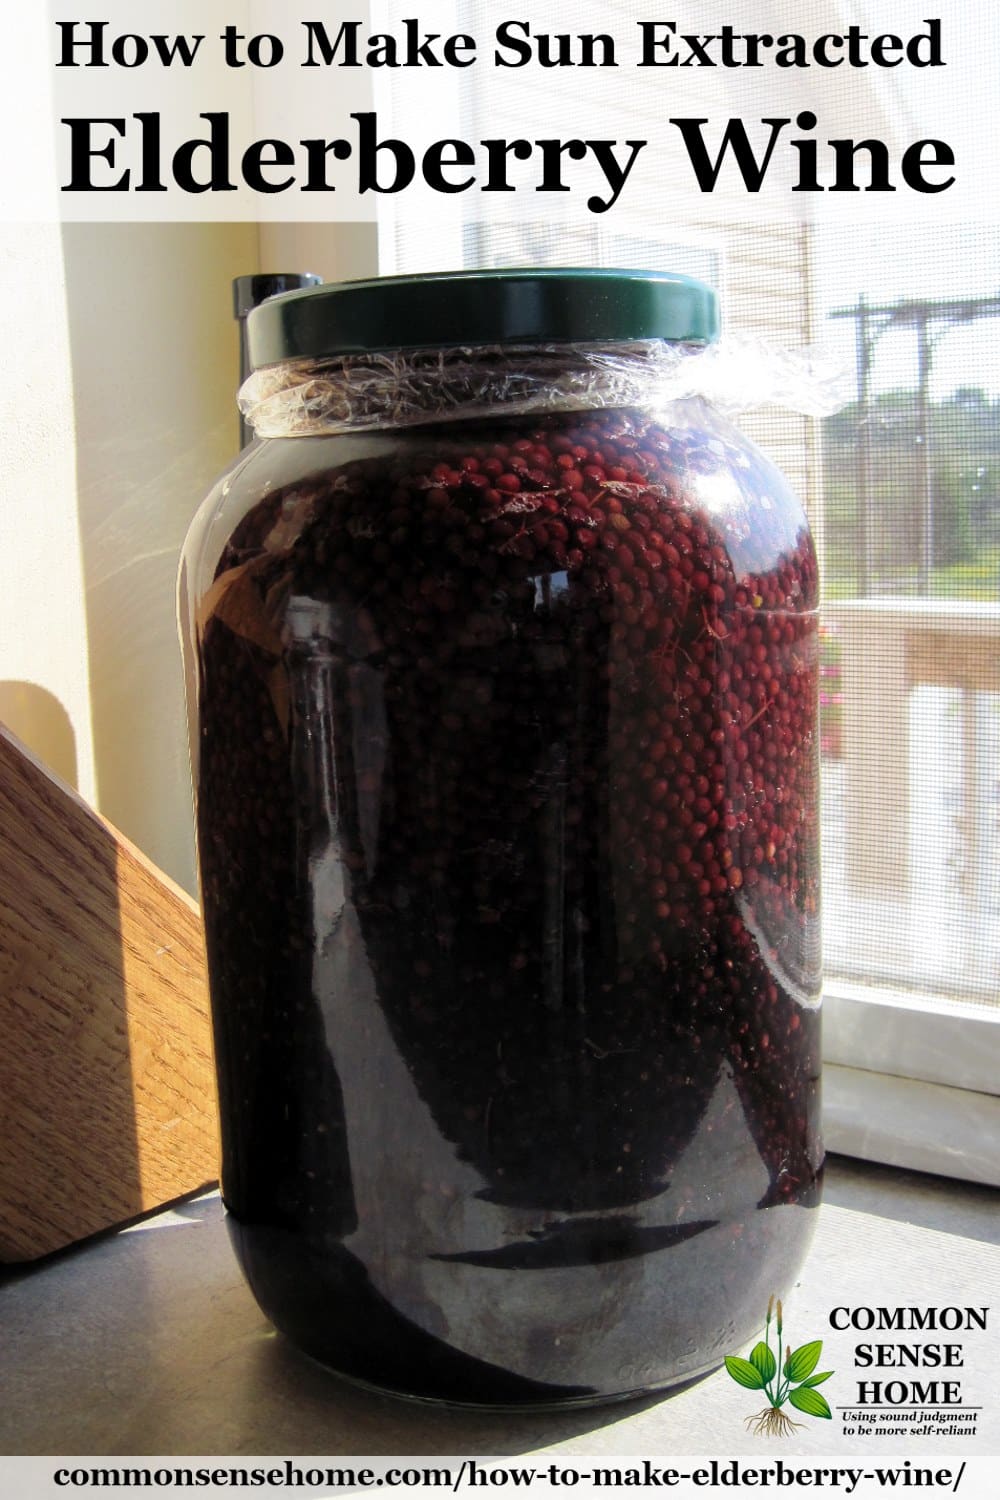
- Elderberry Wine Recipe (Sun Extraction Method)
- Elderberry Sun Wine Notes
- Sun Extracted Elderberry Wine
- Ingredients
- Instructions
- Notes
- Did you make this recipe?
- Heavy Elderberry Wine Recipe
- Heavy Elderberry Wine
- Ingredients
- Instructions
- Did you make this recipe?
- How to Find Elderberries
- How to Clean and Process Elderberries
- Savoring the Elderberry Harvest
How to Make Elderberry Wine – 2 Recipes
Both of these recipes are adapted from the book "How to Make Wine in Your Own Kitchen", which is out of print but worth tracking down.
Ingredients
- 4 quarts loosely packed elderberries (be sure they are dark ripe)
- 2 quarts boiling water
- 6 cups cane sugar
- 1 cup of chopped raisins
Directions
This recipe is made in stages. In stage one, you steep the elderberries in water; in stage two, you add the sugar and raisins.
Remove elderberries from stems and pack in a gallon glass jar. Bring two quarts of water to a boil. Make sure your jar is warm (you can set it in a tub of warm water) to prevent breakage. Pour the boiling water over the elderberries. Leave a healthy inch of space at the top, because they will swell and expand.
Make a plastic liner for the metal cover. Put the cover on loosely (enough to keep the bugs out, but loose enough that it can vent). Set in a sunny place outside for three days.
After three days, strain the berries through a jelly bag or flour sack towel, squeezing out as much of the liquid as possible.Pour juice back into the glass jar or one gallon crock. Stir in the sugar, making sure it is all dissolved. Add chopped raisins. Cover loosely and keep in a warm place indoors to continue fermentation for three more weeks.
At the end of this time period, strain through several layers of cheesecloth (a flour sack towel or old cotton t-shirt will also work). Siphon into clean, sterilized bottles. (See Easy Cleaning and Sanitizing and Wine Siphoning Instructions.) Cork lightly at first (or put a balloon over the top). When your balloon doesn't inflate or you see no bubbles on the bottle walls, cork tightly and store on their sides. Seal with wax for longer storage. Keep for at least one year before drinking.
Elderberry Sun Wine Notes
I set mine in a sunny window, then out on the deck in various spots, and then brought it inside at night. We have a groundhog that's been visiting the deck at night, at I didn't want it getting in the hooch. The liquid should be bright red in color after three days in the sun.
You'll note that this recipe has no added yeast. This made me a little nervous, since wild yeast can be less reliable. Mine didn't start bubbling right away, but I cheated a bit and used the same spoon to stir both batches of wine. (The other recipe has commercial wine yeast.) Spoon sharing got the fermentation going. If you don't see bubbles within a couple of days, it's probably safer to add commercial yeast so your wine doesn't spoil or turn into vinegar.
An easy elderberry wine with just four ingredients, brewed in the sun.
- 4 quarts loosely packed elderberries (be sure they are dark ripe)
- 2 quarts boiling water
- 6 cups cane sugar
- 1 cup of chopped raisins
- This recipe is made in stages. In stage one, you steep the elderberries in water; in stage two, you add the sugar and raisins.
- Remove elderberries from stems and pack in a gallon glass jar. Bring two quarts of water to a boil. Make sure your jar is warm (you can set it in a tub of warm water) to prevent breakage. Pour the boiling water over the elderberries. Leave a healthy inch of space at the top, because they will swell and expand.
- Make a plastic liner for the metal cover. Put the cover on loosely (enough to keep the bugs out, but loose enough that it can vent). Set in a sunny place outside for three days.
- After three days, strain the berries through a jelly bag or flour sack towel, squeezing out as much of the liquid as possible. Pour juice back into the glass jar or one gallon crock. Stir in the sugar, making sure it is all dissolved. Add chopped raisins. Cover loosely and keep in a warm place indoors to continue fermentation for three more weeks.
- At the end of this time period, strain through several layers of cheesecloth (a flour sack towel or old cotton t-shirt will also work). Siphon into clean, sterilized bottles. (See How to Clean and Sterilize Bottles and How to Siphon Wine.) Cork lightly at first (or put a balloon over the top). When your balloon doesn't inflate or you see no bubbles on the bottle walls, cork tightly and store on their sides. Seal with wax for longer storage. Keep for at least one year before drinking.
Notes
- I set my elderberry sun wine in a sunny window, then out on the deck in various spots, and then brought it inside at night. We have a groundhog that's been visiting the deck at night, at I didn't want it getting in the hooch. The liquid should be bright red in color after three days in the sun.
- You'll note that this recipe has no added yeast. This made me a little nervous, since wild yeast can be less reliable. Mine didn't start bubbling right away, but I cheated a bit and used the same spoon to stir both batches of wine. (The other recipe has commercial wine yeast.) Spoon sharing got the fermentation going. If you don't see bubbles within a couple of days, it's probably safer to add commercial yeast so your wine doesn't spoil or turn into vinegar.

Heavy Elderberry Wine Recipe
Ingredients
- 4 quarts of loosely packed elderberries
- 4 quarts of water
- 8 cups of cane sugar
- 2 cups of raisins, finely chopped
- 3 shredded wheat biscuits or 1 cup Wheat Chex – OR – 1 teaspoon yeast nutrient (to aid fermentation)
- 1 package of dry granulated yeast, or one package wine yeast
Directions
Place elderberries in a large stockpot with 4 quarts of water. Boil for 30 minutes. Let cool to lukewarm.
Strain elderberries through a jelly bag or flour sack towel, squeezing until the pulp is very dry. Note: this will coat the towel with blue/brown sticky "ick" that is very hard to remove. I've washed mine twice and it's still tacky.
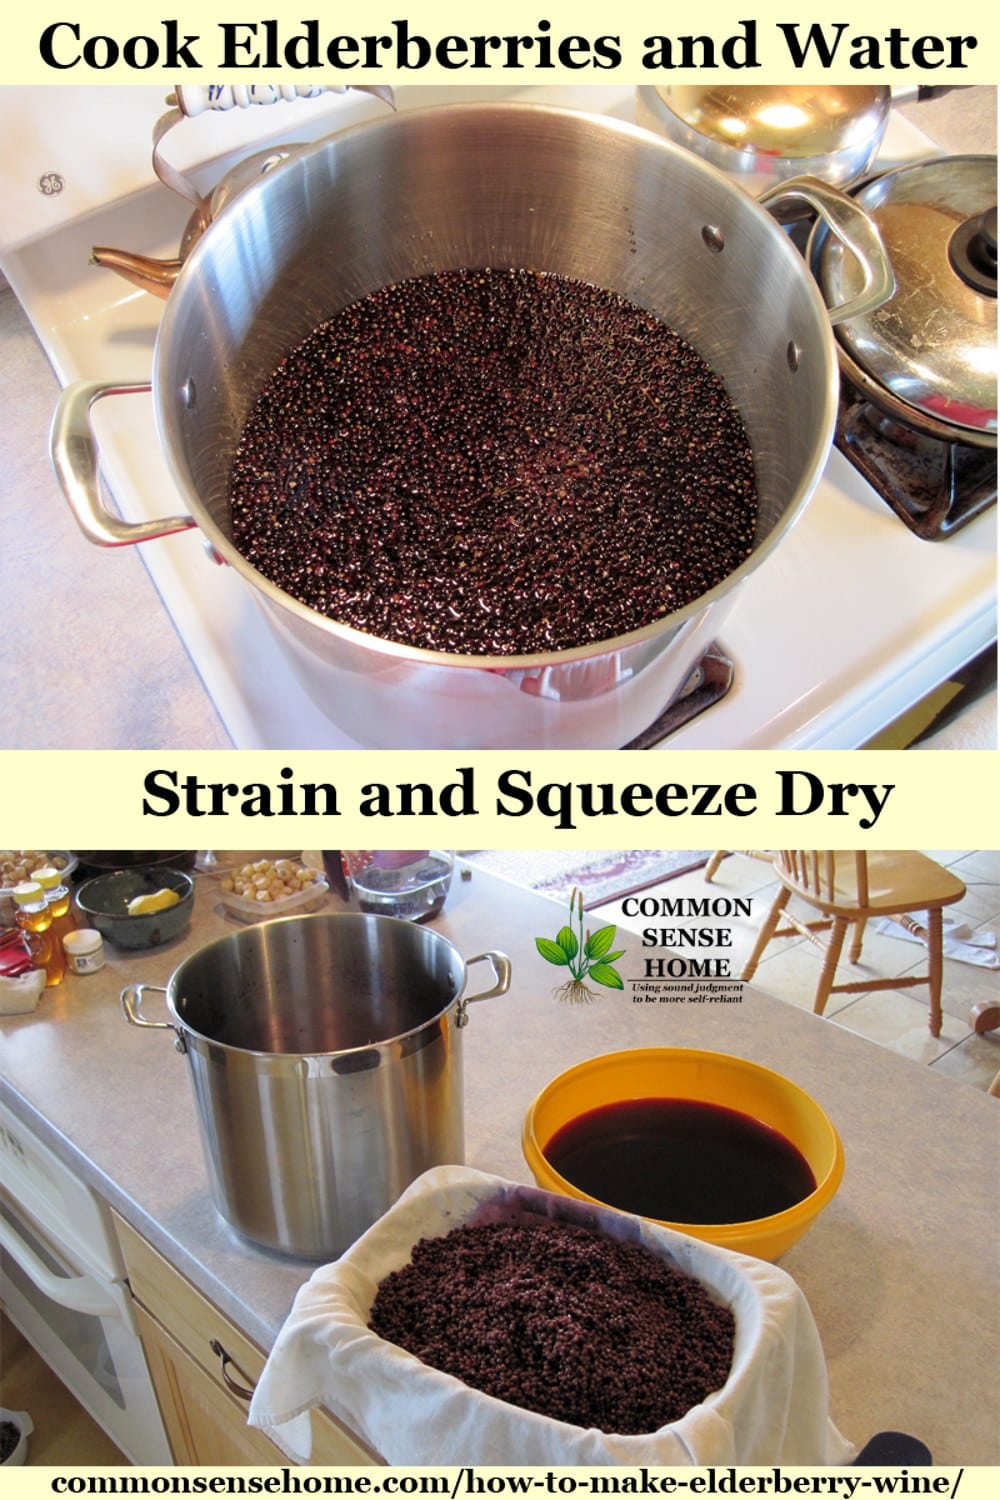

Pour the juice into a crock or large canner kettle. (I used my 3 gallon crock for a double batch.) Stir in the sugar, making sure it is all dissolved. Add the finely chopped raisins. Break the shredded wheat over the surface; or, if using Wheat Chex, sprinkle whole over the surface. Note: If you are gluten sensitive, you may wish to substitute two teaspoons of yeast nutrient for the wheat products.
Distribute the dry yeast over the surface; allow to hydrate and then mix into wine.
Cover with a flour sack towel and put in a warm place to ferment for three weeks. I keep the towel secured with an old hair band to keep fruit flies out. (They love wine.) Stir gently twice a week.
At the end of this period, strain through several thicknesses of cheesecloth. Return to kettle or crock to settle for two days more. Siphon off into clean, sterilized bottles and cork lightly (or cover opening with a balloon). When fermentation has ceased, cork tightly and store for at least one year before drinking.
Heavy Elderberry Wine

A sweet elderberry dessert wine with a pleasant kick.
- 4 quarts of loosely packed elderberries
- 4 quarts of water
- 8 cups of cane sugar
- 2 cups of raisins, finely chopped
- 3 shredded wheat biscuits or 1 cup Wheat Chex – OR – 1 teaspoon yeast nutrient (to aid fermentation)
- 1 package of dry granulated yeast, or one package wine yeast
- Place elderberries in a large stockpot with 4 quarts of water. Boil for 30 minutes. Let cool to lukewarm.
- Strain elderberries through a jelly bag or flour sack towel, squeezing until the pulp is very dry. Note: this will coat the towel with blue/brown sticky "ick" that is very hard to remove. I've washed mine twice and it's still tacky.
- Pour the juice into a crock or large canner kettle. (I used my 3 gallon crock for a double batch.) Stir in the sugar, making sure it is all dissolved. Add the finely chopped raisins. Break the shredded wheat over the surface; or, if using Wheat Chex, sprinkle whole over the surface. Note: If you are gluten sensitive, you may wish to substitute two teaspoons of yeast nutrient for the wheat products.
- Distribute the dry yeast over the surface; allow to hydrate and then mix into wine.
- Cover with a flour sack towel and put in a warm place to ferment for three weeks. I keep the towel secured with an old hair band to keep fruit flies out. (They love wine.) Stir gently twice a week.
- At the end of this period, strain through several thicknesses of cheesecloth. Return to kettle or crock to settle for two days more. Siphon off into clean, sterilized bottles and cork lightly (or cover opening with a balloon). When fermentation has ceased, cork tightly and store for at least one year before drinking.
How to Find Elderberries
Elderberries like moist soil, so you'll find them in ditches, along the edges of wet woodlands, near lakes and rivers, and other damp ground. They are native to North America, and can be found throughout most of the US and Eastern Canada, except for in the northwest (see USDA elderberry range map).
We went foraging for elderberries along country roads here in northeast Wisconsin. My friends had scouted out the area in previous years, so they knew where to start looking. The plants don't look very showy, but you can watch for the clumps of berries near the top. Here's an elderberry patch we spotted on the side of the road.

Elderberry berries grow in clusters that stick out above the foliage. If you look closely at the photo above, you can see dark blobs in the shrubs.
Be careful to make sure you have a positive identification. Elderberry is sometimes confused with water hemlock, inkberry, or pokeberry, but if you look closely, these plants are quite different.
Elderberry leaves grow on soft green stems in pairs.

Alternatively, if you can't find elderberries in the wild, some folks are now raising them for sale (but you normally have to buy in quantity, unless you can find them locally).

Berries are most easily harvested by snipping off the clumps and gathering them in a bucket. They will stain if smashed, so trying to strip off individual berries is asking for a mess. I like to tie a bucket around my waist and wade right in.

How to Clean and Process Elderberries
Once you have enough berries, they should be stripped from the stems before making the wine. A few stems is fine, but you don't want a lot of them because they contain cyanide-inducing glycoside (a glycoside which gives rise to cyanide as the metabolism processes it). They are also very sticky – like glue – and will coat your hands and your fermenting vessels. Elderberry stems are bitter, too, and high in tannins. A few bugs tend to hitch rides in the bucket as well, and you don't want them in the wine.
The boys preferred to comb the berries of the stems with a wide-toothed comb, I just used my hands. Some site suggest freezing first to make them easier to strip, but this worked fine with the modest amount we had (about two five gallon buckets full).
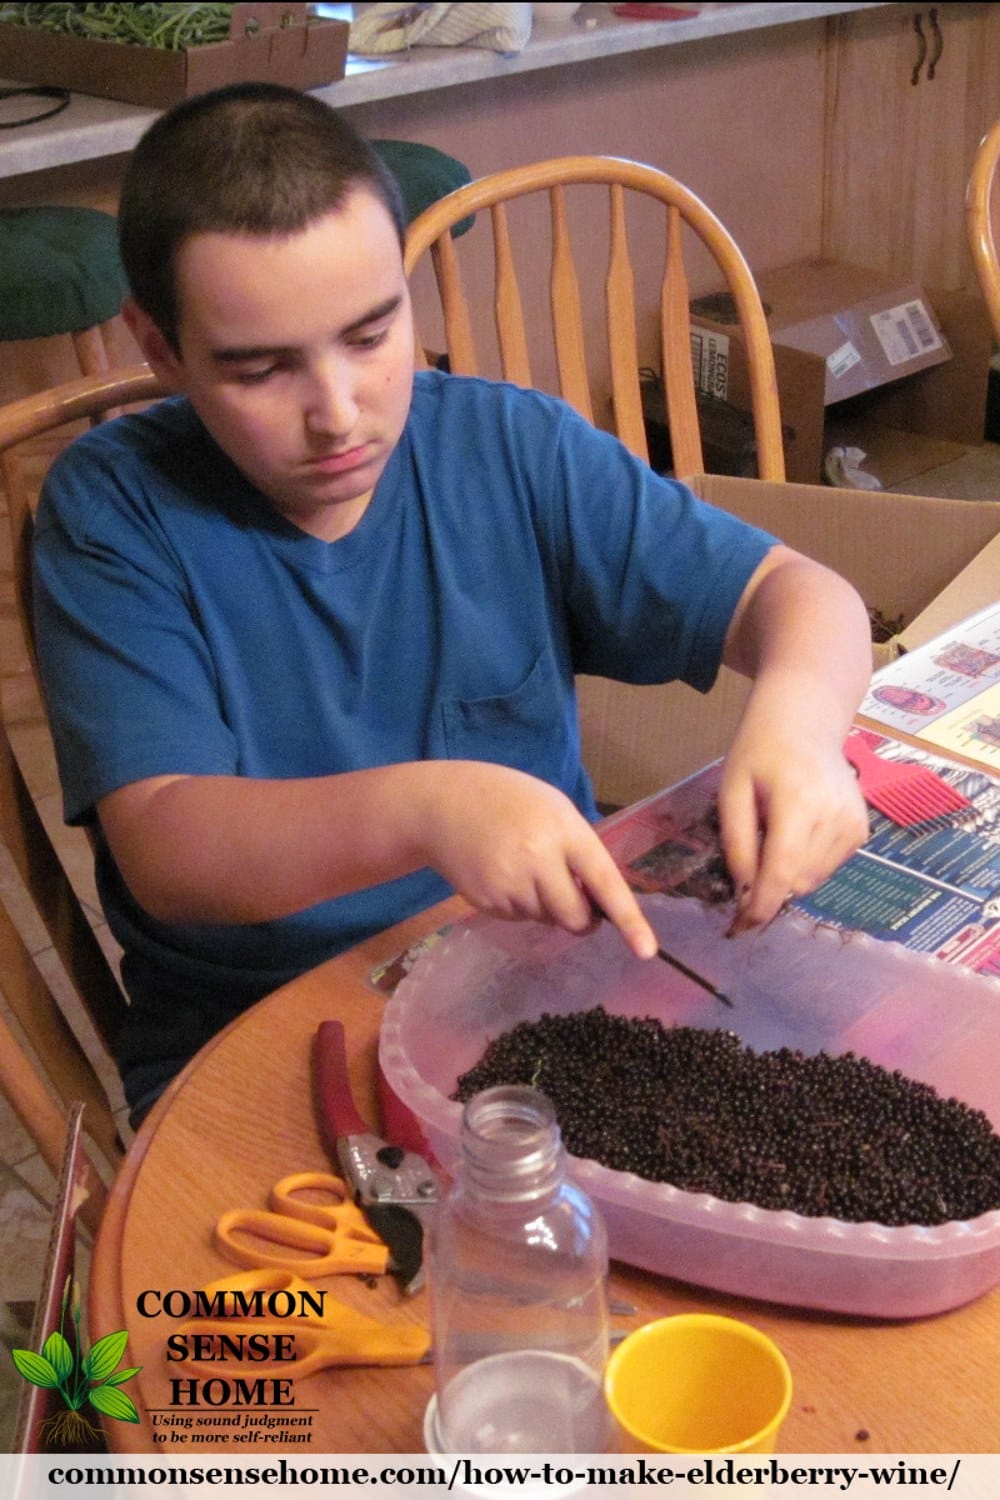
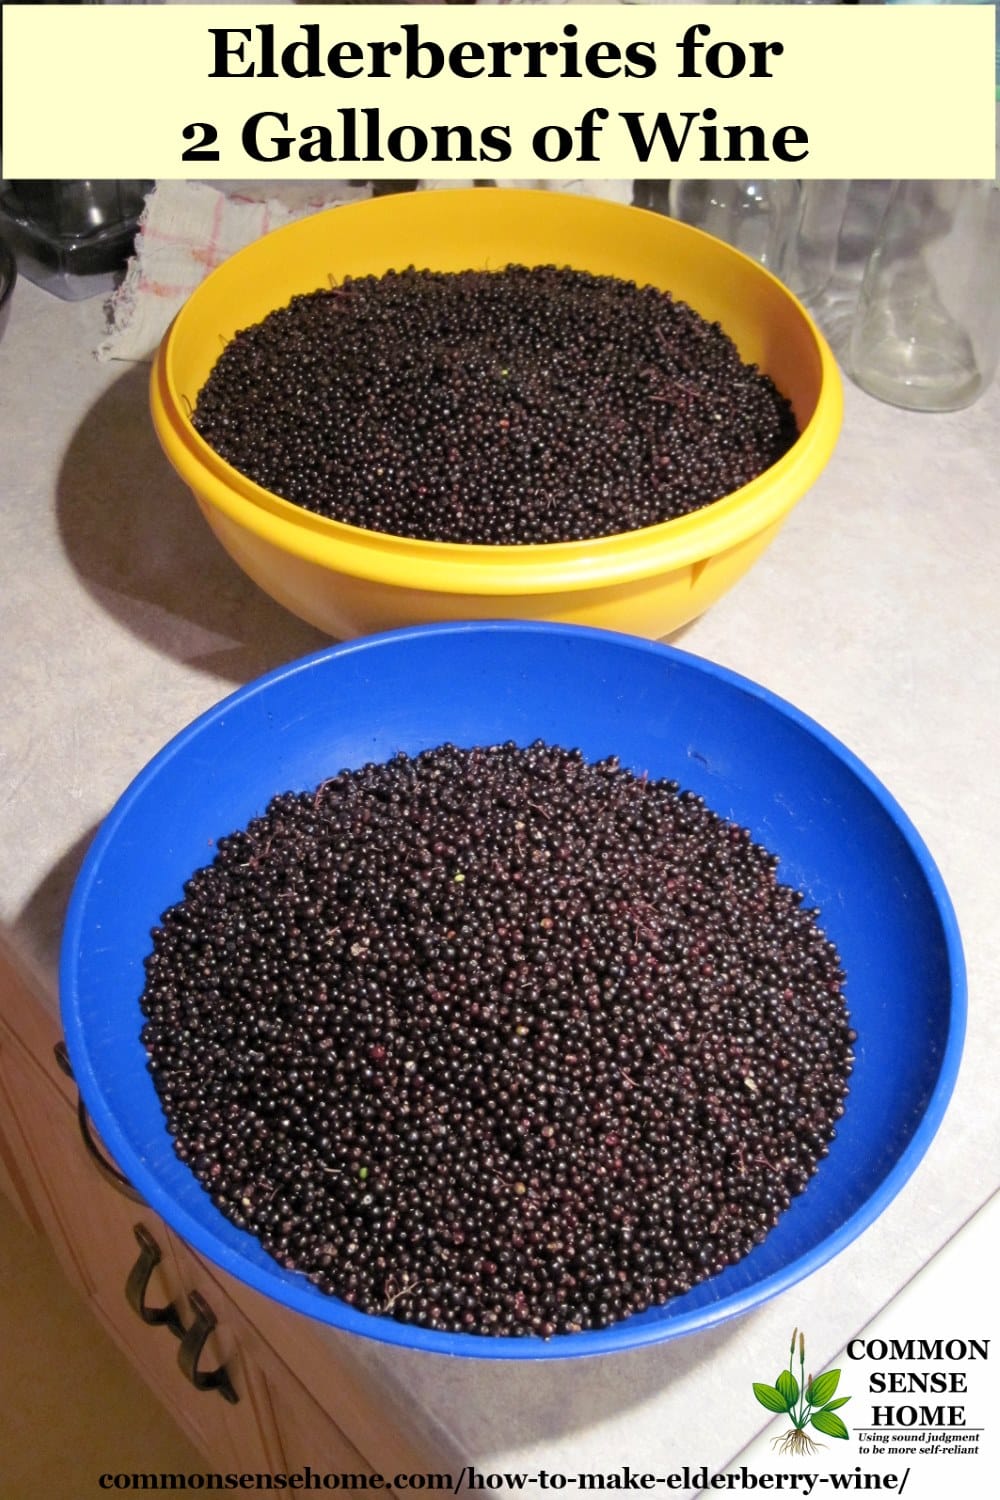
I put the finished berries in my Oneida Expanding Colander over the sink strainer and gave them a rinse before starting the wine. Here are the cleaned berries for two 1 gallon batches of elderberry wine.
Savoring the Elderberry Harvest
Both of these wines are rich, sweet and fruity. Heating the elderberries really brings out the berry scent, and once the yeast kicks into action it fills the kitchen with earthy, yeasty goodness. To me it smells like abundance. If I have enough fruit to ferment, then it's been a bountiful year. I'm not much of a drinker, but it's nice to have the option to share a special brew with friends and family. Wine is quite forgiving, and so far my home wine making results have been pretty good.
You may also enjoy:
- Easy Strawberry Wine Recipe – Perfect for Beginners
- Pumpkin Wine
- Dandelion Wine – Like Sunshine in a Bottle
- Pear Wine – A Great Way to Use Very Ripe Pears
Originally published in August 2012, updated in 2016. The boys are much bigger now.
Source: https://commonsensehome.com/how-to-make-elderberry-wine/
0 Response to "Wine Bottles That Have a Light Blue Wrap"
Postar um comentário